|
killas
guide to easy skinning
You'll
notice on the command pannel a few buttons
have appeared. We'll only be using the 'Edit'
and 'Planar Map' buttons.
Select
your chassis. Where it says Unwrap UVW on
the command bar click the little plus sign
to the left of it. 'Select face' should
appear. This allows us to edit the mapping
of certain faces at a time.
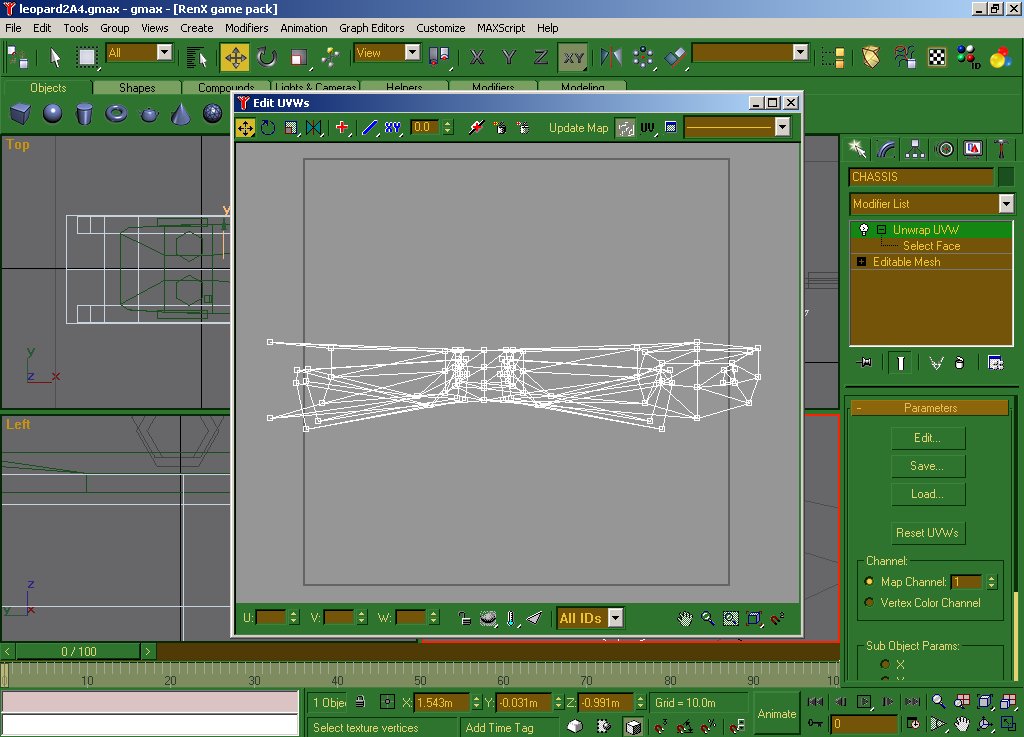
Click
the edit button. The mess you see in the
window that pops up is the Chassis mesh
squashed flat. All the little white boxes
are the vertecies of the mesh. You'll also
notice a dark square border, this is the
texture file boundary. It doesn't matter
is parts of your mesh goes outside this
boundary, becuase the texture is tiled around
it too.
What
we need to is be able to see the skin so
we know where to put the bits. at the top
right is a dropdown box with a line thru
it. drop it down and click "Pick Texture".
on the window that pops up, double click
on the black box labelled "Bitmap",
and find your skin file.
There
we go. Now make room by selecting all the
vertecies and move them outside the boundary.
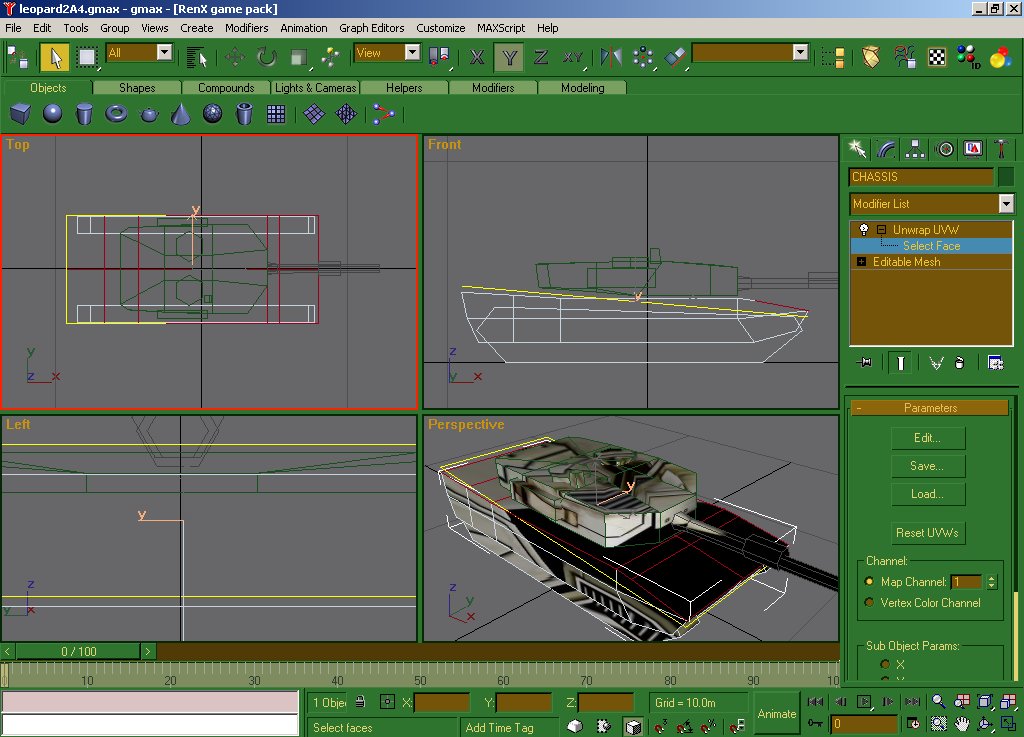
Back
on the normal RenX window, select the Select
Face option, and select all the faces on
the top of the hull like I have. If you
are using perspective view to select them,
having edged faces enabled in the viewport
helps a lot :)
Proceed
to Part 4
|