|
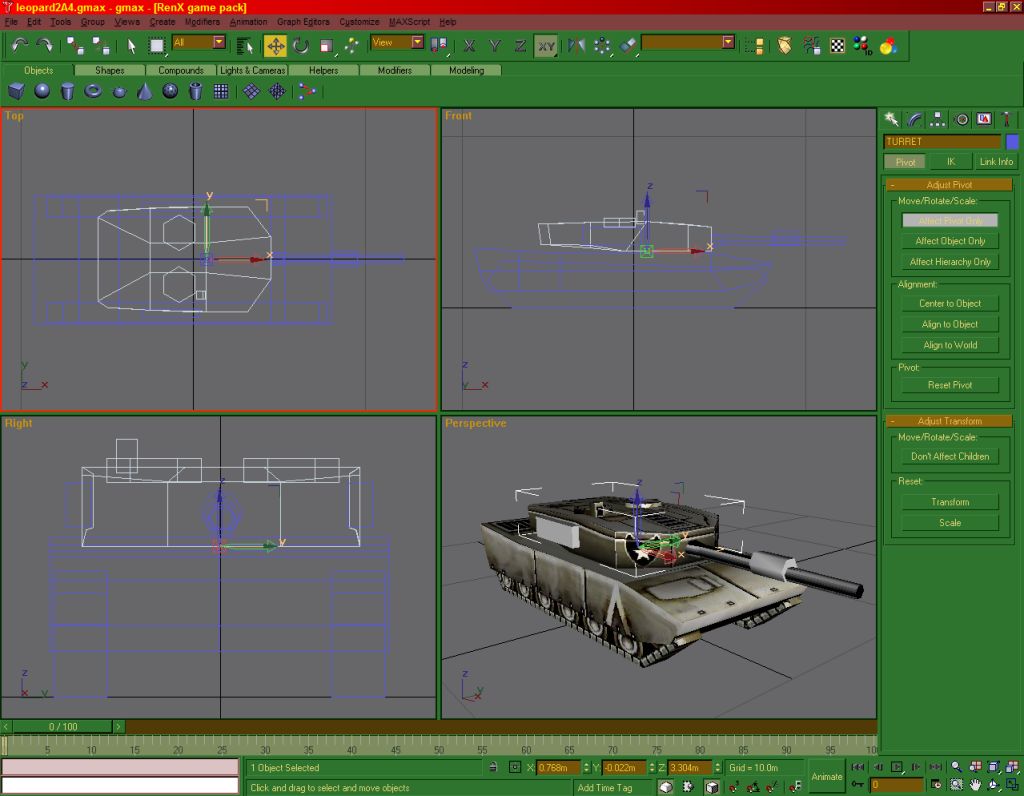
Next
up, we need to position the turret's pivot
point. Select the turret. The location of
this pivot point is important as this is
where the turret rotates around, so it may
look odd if the pivot is out of place. Using
'Affect Pivot Only' again, move the pivot
into the right place. On most modern day
tanks, this would be in the middle and a
little way forward. If you think it's in
the right place, you can test it by rotating
the turret and seeing if it looks ok. To
me this looks ok, sure it looks silly because
the barrel isn't linked yet, but I'm looking
at the turret rotation.
It
doesn't matter where the other pivot points
are, as long as they're aligned to
world. If you want to tidy things up a bit
just center the rest to objects.
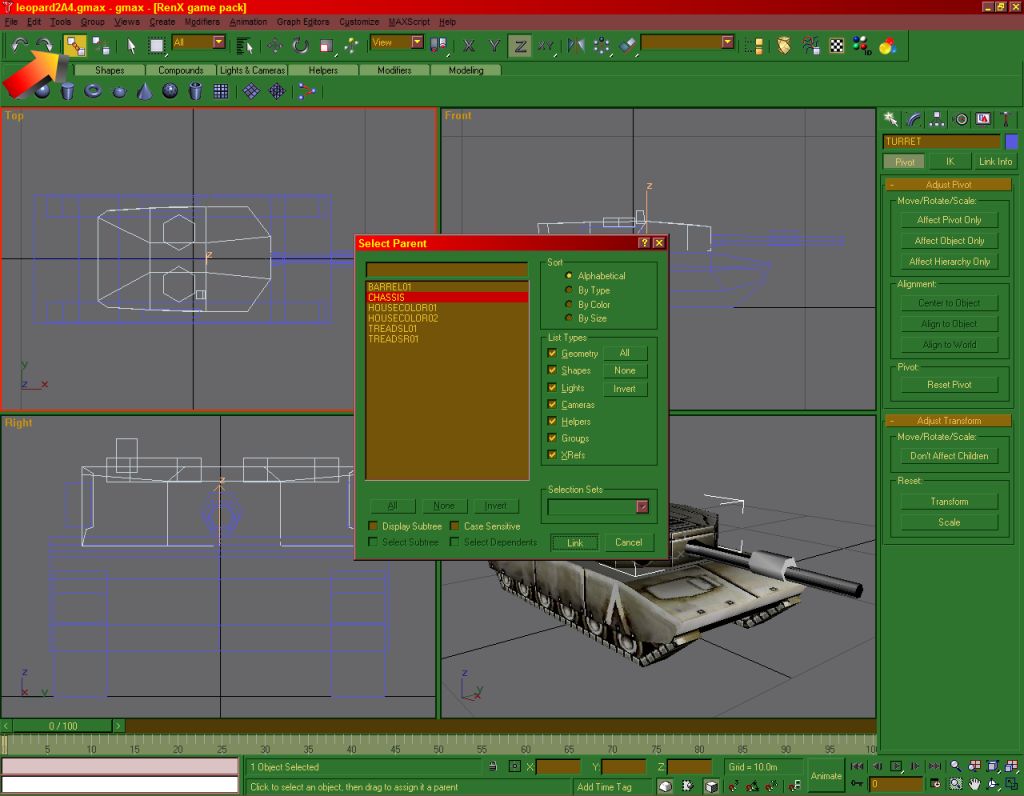
Now
that we have the pivots done, we can link
things up in something called a 'heirachy
subtree'. Basically what this will do, when
we have the turret linked to the chassis,
when the chassis is moved, the turret will
move with it. Clever eh? This may sound
complicated, but you don't really need to
get your head round how it works for
now, just know how to do it so you can get
your tank working. How to do it is actually
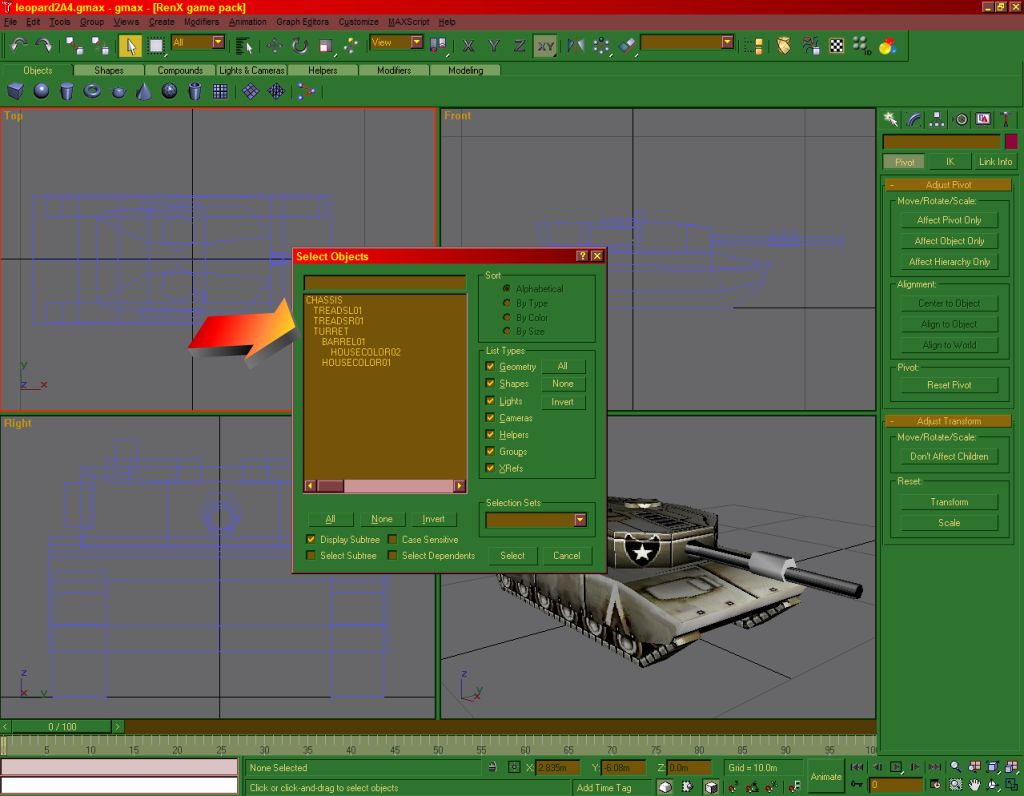
very easy. Hit the 'H' key to bring up the
select objects by name window and select
your turret. This will be the child of the
chassis in the subtree, when linking things
you must select the child first before linking
to the parent. With the turret selected
press the select and link button on the
main toolbar. It's the button with 2 boxes
and a chain. Now hit 'H' again and double
click on the CHASSIS. The chassis mesh will
blink for a moment to show the link was
successful. Click the cursor button to get
out of link mode. Hit 'H' and check the
display subtree box. You should see the
turret under the chassis in the tree. I
told you it was easy!
Now
repeat what you just did, but link the Barrel
under the turret and the 2 treads under
the chassis. Teamcolors on the turret should
be linked to the turret and so fourth. Now
the tank is ready to get some bones!
Page
3
|


|