|
Part
6, Making a wotsit for your something
1. Create another box object, remember to give it some segs! It should
automatcally have as many segs as the last cube object was set to have. When
you're happy with how many segs it has, right click your object and convert
it to 'Editable Mesh'.
2. Use which ever method you like to edit this
new cube. it doesn't matter how long it takes you. You can keep going back to
bits and moving them bit by bit untill it's just right. also remember you
can keep going back to other objects and edit them too untill it all fits
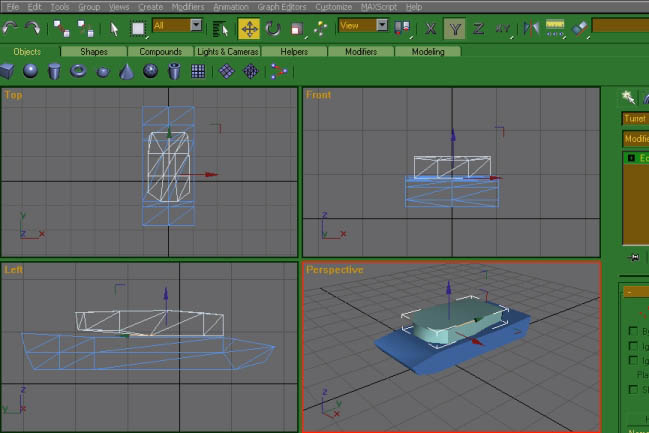
together perfectly. Remember to give your new object a name! If you want
this is a good point to save and check you poly count. My tank has 140 polys
here:
3. I think you're starting to guess what it is.
Now select the 'Cylinder Object' from the tab panel. Create this object just
like the cube. Now we have a pole, a very high poly pole.
4. But dont go dancing around it just yet. We
need to make it more friendly to the poly counts. Reduce the Hight Segments
and Sides. as you reduce the sides you'll notice that the cylinder is
getting less smooth. A good skin covers up this damage, but I'll cover that
in another tutorial. Once you've done this, hit the 'Select and Rotate'
tool. Rotate the cylinder along one of it's axis untill it lies flat.
Alternativly, with the 'Select and Rotate' tool selected you can type 90.0
into one of the axis boxes in the track bar at the bottom.
5. This cylinder can be converted to an editable
mesh just like any other object. Adjust it's radius and height untill it's a
good size and move it into place. Give it a name!
Save
and proceed to Part 7
|