|
Part 2, Creating your first
thingy
Ok, there are two ways of making your
first 3D object. The first way is easy, the second way is advanced. There's
no inbetween. I'm just gonna show you the easy way and leave the advanced
way for another tutorial. I bet you're relieved now.
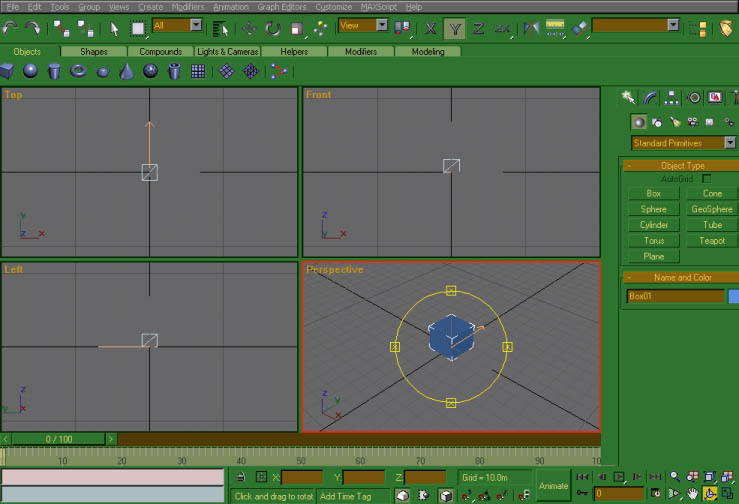
On the tab panel, click the Box Object button.
Then click on any view, hold the mouse button down and drag a square,
release and pull the mouse up. Click again and there you have a 3D cube!
Wow!
Right click on the 'Perspective' view so a red
border comes round it. This is now the active view. Click the Arc Rotate
button on the bottom right corner (selected in picture) and that yellow
circle appears in the active view. Put your cursor inside this circle, click
and hold and spin your view round to take a better look at your
cube.
Click the zoom button (same corner, looks like a
magnifying glass) then click and hold in perspective view and push mouse up to
zoom in and take a closer look at your cube. You can zoom in any of the
views. Pull mouse backwards to zoom out again. You can use the pan tool
(hand) to move the view around in case your cube seems to drift off the
center of the view. Take a few moments to get yourself used to changing your
perspective view. Ok, by now you should be over the awe of creating your first cube, so lets
start mutating it!
Save
and proceed to Part 3
|